But for this tutorial, well use react-native-push-notification plugin, which is made only for Push Notification purpose. We have successfully implemented push notification in a react-native app . By handling, I mean how to access the data sent via the notification inside your app, and wake your app up if it is asleep or closed. You can get the knowledge from the visual flowchart below: Once we have a push token for a given user, we use a Firebase cloud function to trigger push notifications, which in practice is an alternative to our own server. First of all, we need to identify the users, by sending a request to ask for push permissions. We need to copy com.invertase.rnfirebasestarter and paste it into the Firebase console, as shown in the screenshot below: Follow the guiding points in the screenshots and download the google-services.json file into our project folder: Here, we need to register the firebase to your Android application as shown screenshot below: After downloading the google-services.json file into your own project folder, we need to move the file from the main project folder into the projects app folder. I will share the article with my friends. This can lead to duplication.For close and background appWhen the app is closed or in background, the data received is in slightly different format. (Miss it if already have firebase) For setting up options, youll first have to create an Android app in Firebase console.Add a new Android app inFirebaseDuring the process, it will ask you to enter apps package name and provide google-services.json. PushNotification.setApplicationIconBadgeNumber(number: number). Install dependencies for Push notification. this is a notification received in foreground app, You can see we receive all the required data in the notification object, namelyid, title, message, userInteraction and extra data sent as key-value pair. To add the handler, make the following changes on App.js before App(): To test the functionality, you will have to close the application, then send a notification message from the console as in the previous section. 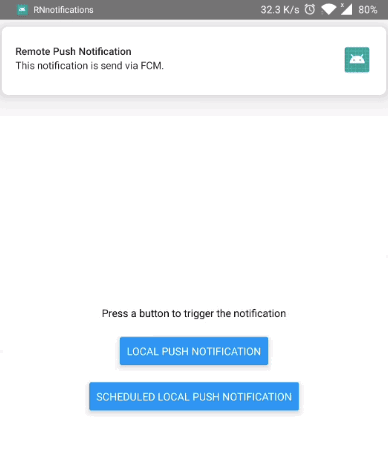 Also, when notification is received, well receive the data via onNotification method. Creating a toggle animation in React Native, NestJS Kubernetes Deployment | Part 4: Kubernetes CronJobNestJS, Implementing Oauth2 Social Login With Facebook Part 2, Getting started with React Native Navigation V3, Generate Release APK with ReactNative CLI (Errors Fixed). In last section, we saw a notification received in open, closed and minimized app. We can achieve this by creating a Cloud function. Download our premium or free app templates to make your own app today! In this tutorial, you will learn how to send Android push notifications with FCM (Firebase Cloud Messaging) and React Native. This module requires that the @react-native-firebase/app module is already set up and installed. To set this up, log on to your Firebase account and create a new project using the Add project card. Make sure you keep a unique package name / bundle ID for your app. Works natively in iOS. The two screenshots from above illustrate the exact data flow necessary to trigger push notifications in React Native using Firebase. Finally, press 'Sync now' in the bar that appears in the IDE, Run $ npx react-native run-android to test if everything is working. It works perfectly. Select the iOS icon that will open the configuration section, Follow the cert instructions here: https://firebase.google.com/docs/cloud-messaging/ios/certs. login, Create It is a Backend-as-a-Service (Baas). I will create a separate file for this PushController.js, and import it in App.js, There are quite a few things going on here. It is based on React, Facebooks JavaScript library for building user interfaces, but instead of targeting the browser, it targets mobile platforms.
Then, we start the app/project using the command below: You should be able to see the following app in your Android emulator: For this step, we need to send a permission request to a user device to allow push notifications and retrieving the push token.  This implements push functionality in the app. and much more. If that does not exist in your project, create it. You can target your app for push notifications. Since it is returning null , it wont affect the layout. In this tutorial, we are going to learn how to send push notifications to React Native using Firebase. Highly customizable, our app templates, coded in Swift, Kotlin and React Native, will jump start your mobile app development and will help you launch your app 10x faster. Build the app onAndroidBuilding on android is fairly easy. You can get this package name inside the /android/app/src/main/AndroidManifest.xml file. Enter your project name, and then click Continue. Create a basic React NativeappFirst, make sure you have all pre-requisites to create a react-native app as per the official documentation.At the time of this post, I have React-Native version 0.60Create a blank react-native app (Replace myApp with your own name)$ react-native init myAppThis will create a basic React-native app which you can run in a device or simulator.
  Version 1 now uses the version 7. Implement push functionality in yourappTo implement push, we need to call PushNotification.configure at our app start. If you liked this blog, you will also If conflicts with existed firebase package, remove this lines, because they already exists. These may change slightly with time, but majority steps will remain common and youll know where to correct things if you face any error. Pay, Stripe They also provide a ready-made starter boilerplate template for us, so that it becomes easy to set up the whole project. firebaseVersion = "17.3.4" // default: "+"
Your console should look like this, NoteIts really easy to create a Firebase project, but if you still face any issue, follow step 14 of this blog. Edit android/build.gradleIn your android/build.gradle , edit the googlePlayServicesVersion and firebaseVersion . This command initializes the push functionality in the app. Sending the title and message as key-value pairs, if these are required in theappExtra Set application badgeiconPushNotification.setApplicationIconBadgeNumber(number: number)Works natively in iOS. I was looking for information. Select the targets you need and click on next. React native developer ,Coffee addict , loving teach other. In a practical application, you can do a lot of stuff using these data values. Install the dependency using$ npm install --save react-native-push-notificationSince I am using react-native 0.60, I dont need to manually link dependencies. targetSdkVersion = 28
Version 1 now uses the version 7. Implement push functionality in yourappTo implement push, we need to call PushNotification.configure at our app start. If you liked this blog, you will also If conflicts with existed firebase package, remove this lines, because they already exists. These may change slightly with time, but majority steps will remain common and youll know where to correct things if you face any error. Pay, Stripe They also provide a ready-made starter boilerplate template for us, so that it becomes easy to set up the whole project. firebaseVersion = "17.3.4" // default: "+"
Your console should look like this, NoteIts really easy to create a Firebase project, but if you still face any issue, follow step 14 of this blog. Edit android/build.gradleIn your android/build.gradle , edit the googlePlayServicesVersion and firebaseVersion . This command initializes the push functionality in the app. Sending the title and message as key-value pairs, if these are required in theappExtra Set application badgeiconPushNotification.setApplicationIconBadgeNumber(number: number)Works natively in iOS. I was looking for information. Select the targets you need and click on next. React native developer ,Coffee addict , loving teach other. In a practical application, you can do a lot of stuff using these data values. Install the dependency using$ npm install --save react-native-push-notificationSince I am using react-native 0.60, I dont need to manually link dependencies. targetSdkVersion = 28
Now that you have learned aboutresources to learn React Native development, here are some other topics you can look into. In this post, we learnt how to implement Push notifications using Firebase in React native apps. The handler will receive the incoming message, structure it, add it to the message state, and display an alert. App-level build.gradle (//build.gradle): Notification channels (Optional) - Work in progress Push notifications are an important user retention lever, so React Native developers run into implementing them with every single app they build. If you face any issue during build, check for the errors in this troubleshooting guide for the plugin, or comment below the post. This is because we dont know the app state when the data is received. For push notification testing, well need to build the app on a physical device. You need a Google Account in order to retrieve push notifications on an Android emulator. include ':react-native-push-notification'
supportLibVersion = "28.0.0"
This method also receives the whole notification data, which is printed in the code above.senderIDis the cloud messaging sender ID from Firebase consolepermissionsallows certain permissions in iOSIn short, when your app starts, well register the app and receive a token as a proof of registration. Beautiful app designs are harder to find in react native since the Read more, Debugging React Native apps with breakpoints is a powerful way to identify and fix bugs, as well as understand new codebases quickly. React Native also exposes JavaScript interfaces for platform APIs, so your React Native apps can access platform features like the phone camera, or the users location. In short, when your app starts, well register the app and receive a token as a proof of registration. We will also learn how to handle push notifications in your React Native apps. Wonderful article! To get started follow the instructions below: $ npm install react-native-firebase-push-notifications --save, $ yarn add react-native-firebase-push-notifications. This is where the magic will happen !Cloud messaging section of Firebase consoleYou can send push notifications fromherePush Notifications SettingsFirebase console also contains push notifications settings for web, android and iOS. This is where the magic will happen ! There is support for local notifications and messaging channel's which will be updated periodically. In step 3.2 above, we called for a white color as the notification_color. Feel free to ask any Now that we have a high-level overview of what needs to be done in order to trigger push notifications in React Native using Firebase, lets get to work. I will post another blog for push in iOS apps in React Native. Essentially I am storing the list items data in this.state.pushData and updating it as we receive push. So, paste the token into the Add an FCM registration token field, as shown in the screenshot below: Now click on the Test button to test that the push notification shows up in your emulator: Assuming that the user has successfully registered for push notifications, and therefor we have a valid push token, lets store it into the database, so that it can be used later. Create the android/app/src/res/values/colors.xml file if it does not exist